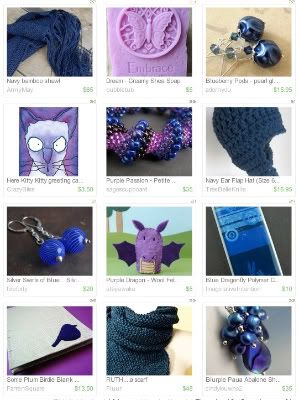
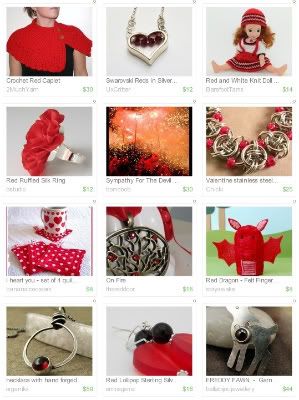
Last year, I was asked to share the techniques that I use to capture treasuries and share them on my blogs. Being able to save the image of treasuries that we make or get featured in is great, but sharing them with our friends and readers is even better.
My original tutorial for capturing treasuries was created for PC users working with Windows Vista or XP. Anyone who has recently upgraded to Windows 7 may know that the process has been greatly simplified. So, I have revised the instructions and will share them here.
I’m going to list each step as clearly as possible, so if you’re just getting to know your computer or the internet, hopefully these instructions will be helpful to you.
One: Open your internet browser and find the treasury that you wish to save. Scroll down so that all of the items are centered in the window, and nothing is cut off.
Two: Take a screenshot of the page to grab the treasury. Hold Ctrl on your keyboard, and press Print Screen [Prt Scr].
Three: Open the Paint tool in Accessories. Paste the treasury screenshot onto the page. Hold Ctrl and press V.
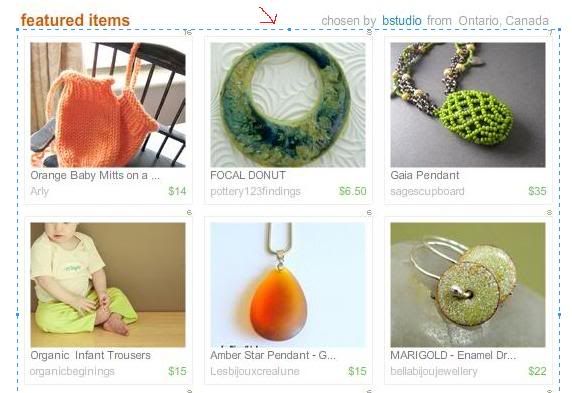
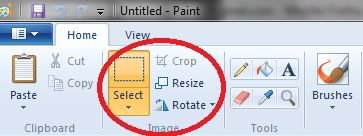
Four: Click on the tool icon that shows a dotted rectangle. Use your mouse to draw a box around the treasury, only capturing what you want to show. Leave a few mm of boarder around the edge, and try to make all of the sides evenly spaced.
Now that you have this image of your treasury, you can upload it and share it almost anywhere you want to. A few good places to show off an Etsy treasury are your Facebook page, Flickr pool, and your blog. Most blog platforms allow you to upload images directly from your computer; but with a few extra steps, you can show off your treasury, and improve the look and SEO of your blog at the same time.
One: You will need to upload your treasury snippet to an image hosting site like Photobucket. Be sure to upload it to the correct album or sub-album. If necessary, relocate the file before completing the next steps.
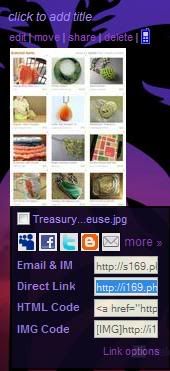
Three: At the point in your blog text where you want to display your treasury, type the following code:
<img src="YourImage" alt="ImageTitle" title="ImageTitle">
Replace YourImage with the URL for your picture. Replace ImageTitle with a name for your picture. The alt tag will create a text caption if viewers have HTML turned off, or if the image doesn’t load properly. You’ve probably seen these before. Instead of a picture, a box with a red X will appear, and if the alt tag is used, the name of the image will also show. The title tag will create the yellow caption that appears when you hover your cursor over an HTML image. Both of these tags can also help your picture and blog show up in search engines, so it’s a good idea to use relevant keywords in your image title.
You will need to add this code in the HTML editor of your blog platform. If you would like the image to be a clickable link to another destination, you can highlight the code, and use the link tool of your blog editor to add the destination URL. You can also add the code by hand. It will look like this:
<a href="Destination URL" target="_blank"><img src="YourImage" alt="ImageTitle" title="ImageTitle"></a>
If you want to link back to the actual treasury that you are sharing, remember that Etsy treasuries eventually expire. Broken links aren’t good for SEO (Search Engine Optimization), so it’s a good idea to remove the link code after the treasury has expired.
The target=“_blank” code will make the link open in a new window (unless the viewer right clicks or has tabbed browsing set up). This will make sure that readers don’t lose track of your blog when checking out your link.
Four: Set the alignment for your image.
To center the picture between paragraphs, enter the HTML on a new line, and add paragraph tags to center it. It will look like this:
<p align="center"><img src="YourImage" alt="ImageTitle" title="ImageTitle"></p>
<p style="FLOAT: right; MARGIN: 10px 10px 10px 10px;"> for right hand images
or
<p style="FLOAT: left; MARGIN: 0px 10px 10px 0px;"> for left hand images.
To make a handy reference of the HTML code, you can highlight and copy it, and save it to a text file, like Notepad or WordPad.
If you upload images to Flickr, you can also use their handy "Blog This" tool to show of single treasuries. This option only works for one image per blog post, but it's great for adding a quick blurb to your blog.
To find out when a new treasury spot will open up, check in with the Treasury Clock on Craftopolis.com. It keeps track of Treasury Main and Treasury West, and provides a fairly accurate countdown to the next opening.
Copyright 2010 Oh Canada Team and Inspirational Beading

 Proudly Canadian?
Support Handmade!
Grab This Button!


2 comments:
Very helpful article, thanks.
I also wanted to let you know that I've nominated Oh Canada! for a Sunshine Award. You can check out the details on my blog.
http://cjgrand.blogspot.com/2010/02/sunshine-award.html
This has been an extremely helpful article and enabled me to figure out how to do the same thing using my Corel PhotoPaint program!
Thanks!
Post a Comment